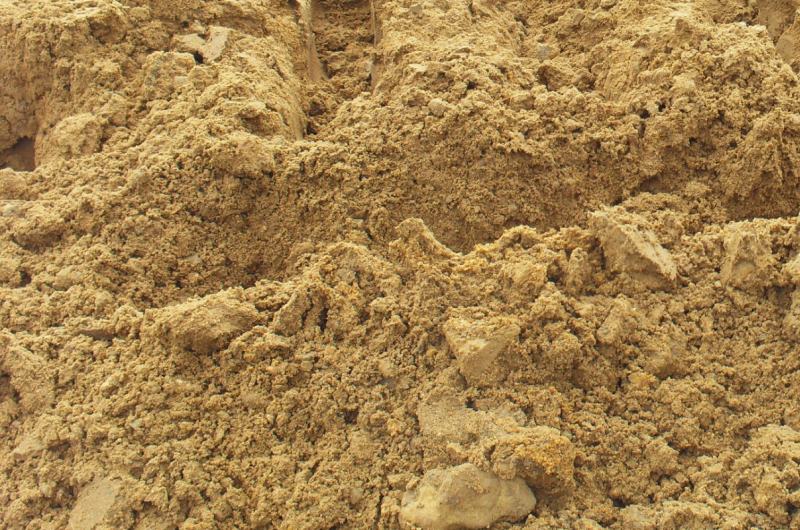
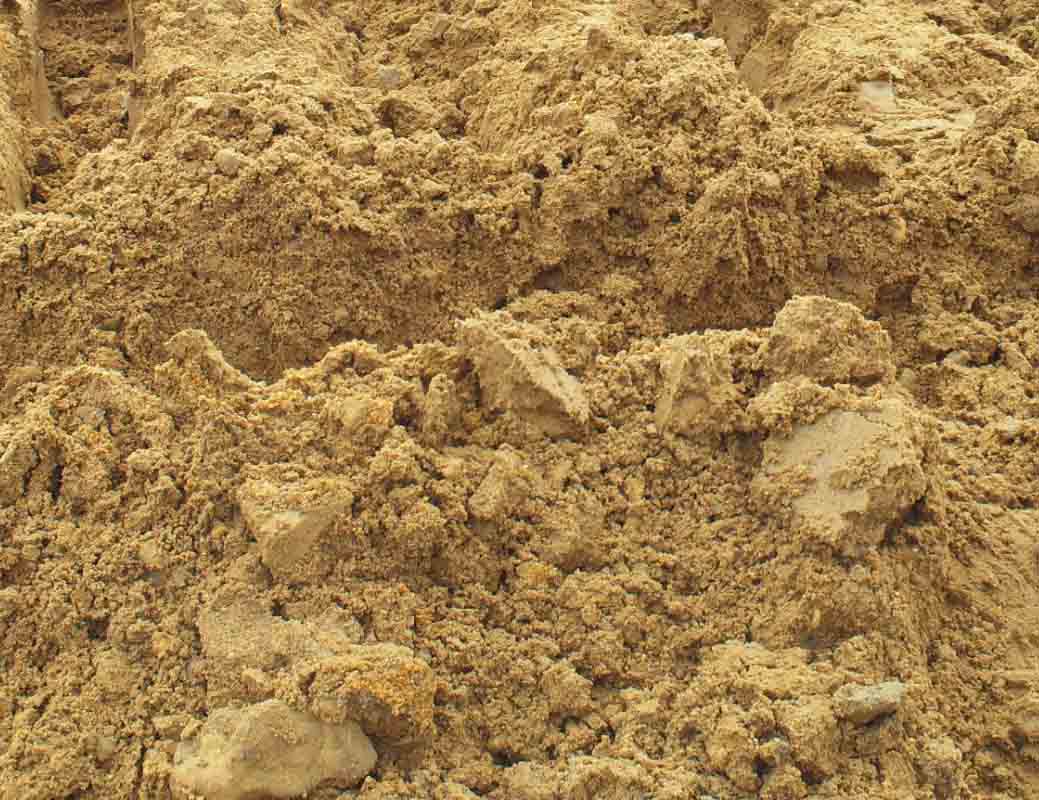
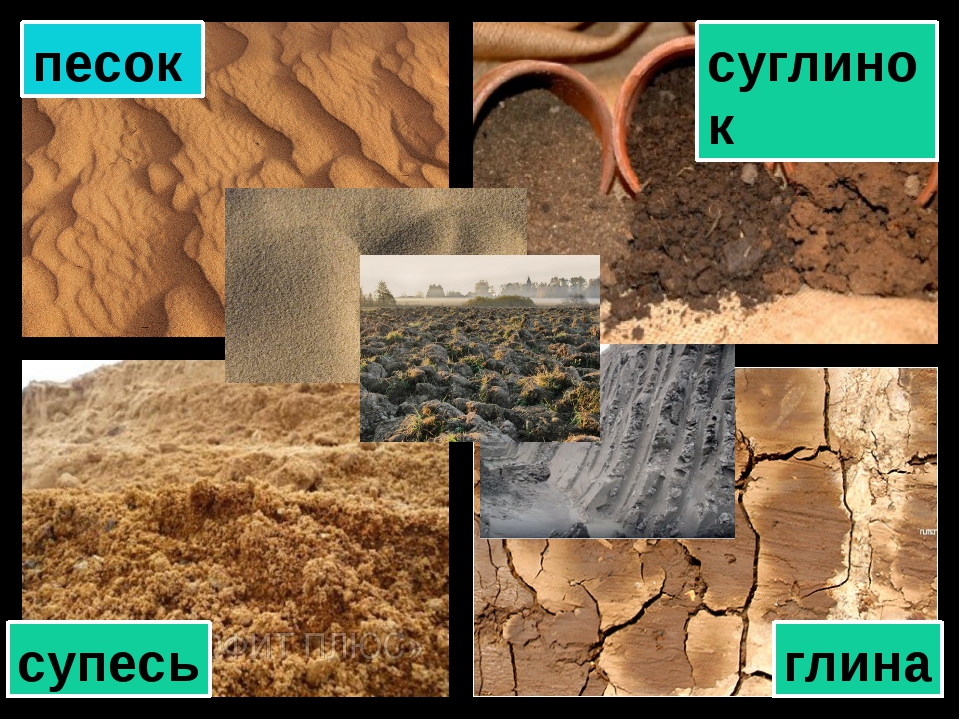
Песок — это сыпучий материал из осадочных горных пород, состоящий из зёрен размером от 0,16 мм до 5,0 мм. Зёрна диаметром более 5 мм относятся к щебню, менее 0,16 мм — к пыли.
Песок — наиболее распространённый строительный материал. Его используют в железобетоне, асфальтобетоне, во всех сухих строительных смесях, штукатурных растворах, в качестве дренажного слоя при подготовке оснований фундаментов, дорог всех классов и во многих других строительных и промышленных технологиях.
Глина также состоит из осадочных горных пород, но, в отличии от песка, они представлены в ней очень мелкими частицами. Основные минералы в глинах — из группы каолинитов, образовавшихся при распаде полевого шпата.
Глина имеет широкое применение. Из разных сортов этого материала изготавливают техническую керамику, посуду, художественные изделия, игрушки и поделки. Её используют в медицине, косметологии, изготовлении глинобитных жилищ. Много глины во всех странах идёт на изготовление кирпича.
Использование песка с глиной
Песок с глиной применяют, в основном, в качестве строительного материала. Для кладки каминов, печей годятся только огнеупорные кирпичи и раствор из глины и песка. Соотношение глины и песка в такой смеси может быть от 1:2 до 1:4. Всё зависит от качества глины. Жирная чистая глина требует больше песка, тощая — меньше.
Чтобы проверить правильность пропорции глины и песка в смеси для кладки камина или печи, готовый раствор наносят на кирпич тонким слоем (1 см) и подсушивают эту инсталляцию в печи, топке, в термошкафу, на электроплитке. Если высушенный раствор потрескался – в нём много глины, нужно добавлять песок. Если трещин нет, но материал крошится – много песка, нужно добавить глины.
Такая отработка технологии одновременно с подбором массового состава ингредиентов позволяет определить адгезию раствора из глины и песка к кирпичу. Оба материала — термостойкие, этим и обусловлено их применение в печном деле.
Песок с глиной используют и в качестве штукатурного раствора. Его составляют из песка, глины и древесных опилок. В некоторых случаях добавляют цемент, который придаёт поверхности недостающую прочность. Опилки являются связующим материалом, уменьшающим растрескивание. Для изготовления таких покрытий часто используют природные суглинки — смеси песка с глиной.
Готовые сухие смеси песка и глины для кладочных и штукатурных работ можно купить в строительных магазинах. Их расфасовывают в бумажные мешки по 25 кг. Для приготовления раствора материал нужно затворить водой и выдержать в течение времени, указанном в инструкции.
Различие свойств разных сортов глины и песка иногда требует корректировки состава купленной смеси. Для выверенных пропорций требуется большой опыт исполнителя работ.
Приглашаем посетить нашу компанию и приобрести строительные смеси песка с глиной для кладки каминов и печей.
О глине и песке — chispa1707 — ЖЖ
Как-то давно пришел к выводу, что с песком не все чисто. Если это продукт выветривания пород, — пусть будет гранит — то на каждые 60 кубометров песка в Сахаре, Бразилии или Сибири должно приходиться 35 кубов полевого шпата, и вот этого полевого шпата мы в таких количествах вокруг себя не видим. Какую земную породу ни возьми, ситуация будет той же: на каждый куб окиси кремния должны приходиться два-три куба других минералов, а их в таком же, как в Сахаре, количестве нет. Мой тогдашний вывод: песок — сразу химически чистым — навалило с неба при чересчур близком проходе космического тела. Поэтому и по размеру он словно откалиброван.Атмосфера — лучшее сито из возможных.
***
Но самое главное, 90 % «лишнего» на Земле песка очень узко локализовано на траектории от Арктики через Сибирь, Среднюю Азию и Переднюю Азию на Сахару и остатки — в Мексику и Бразилию. Эта траектория в точности вторит зоне наибольших природных бедствий в прошлом — там, где целиком физически погибла античная культура, а сейчас доминирует ислам. В моей схеме это результат прохода кометного потока над Арктикой. Для новичков даю ссылку на основной материал:
http://the-small-joys.blogspot.ru/2017/03/25032017_25.html
***
Теперь вопрос о глине. Геологи правильно подумали о пепле как первоисточнике части глин.
В составе золы растений есть Калий (K2O), Фосфор (P2O5) и Кальций (CaO), — и это все — окислы.
***
А вот каолинит (глина)
47 % (мас) оксида кремния (IV) (SiO2),
39 % оксида алюминия (Al2О3)
14 % воды (Н2O).
В принципе — то же самое; это все — окислы.***
Такие окислы можно образовать из чего угодно — при наличии температуры и кислорода. Сунь в топку ТЭЦ любой предмет, и на выходе будут как раз окислы — в основном, кремния, хотя будет и много окислов алюминия.
***
Понятно, что я первым делом подумал о том, что кометная пыль, проходя через атмосферу, попадает как раз в такую топку: что бы в нее ни сунули, на выходе (на земле) будет очень много золы.
***
Но нельзя было выкидавать и гипотезу о вулканическом пепле и золе. Я проверил. Вот набор летучих компонентов, выбрасываемых вулканами, фумаролами и другими источниками: СО, СО2, SO2, h3S, CSO, N2, N2O3, N2O5, NO3, Nh5Cl, Ph4, Ch5, Kr, Xe, Ne, He, h3, Se, SiF4, h4BO3. Плюс, в выбросах наблюдается повышенное содержание таких элементов, как Ga, V, Си, Со, Ni, Cr, Sr, Ba, Zr, U, Th и др.
Алюминия нет. В принципе нет.
***
Может быть, алюминий — исключительный случай, и в природу попал из-за разрушения лавы, например, базальтовой? Однако в базальте окисла кремния 47-52 % (подходит), а окисла алюминия — 14-18 %, а это в 2,5 раза меньше необходимого. Складывается та же ситуация, что и с чистым песком: какой природный минерал ни разрушь, а того количества алюминия, что есть в месторождениях глины, не набрать.
***
Отличие ситуации с песком и глиной — их уникальность. Случись проводить эксперимент в земных условиях, и мы нужных пропорций окисла кремния и окисла алюминия не получим. Отходов в виде массы других элементов будет чересчур много — столько, сколько их на Земле нет.
Такая уникальность могла иметь место в том случае, если «эксперимент» был космическим: пролетевший мимо нас метеорный поток характеризовался именно этим химическим составом, резко отличавшимся от состава земной коры. Данных по составу космических тел немного, однако то, что нашлось, требованиям удовлетворяет.
Цитирую: Частицы из Гэйни состоят главным образом из кварца (SiO2), полевого шпата (К, NaAlSi308), магнетита (Fe3O4) и различных дополнительных компонентов, богатых кальцием, марганцем и алюминием…
По своему строению и свойствам супесь близка к песку. В ней содержится всего 3-10% глинистых частиц каолиновой или монтмориллонитовой группы. Материал добывают в карьерах или прямо на строительных площадках. В нем могут попадаться крупные примеси (галька, гравий) и органика.
Отличить супесь от других глинистых грунтов несложно. По внешнему виду она больше напоминает песок, легко рассыпается. В намокшем состоянии супесь, в отличие от глины, не держит форму.
.jpg)
Применяется супесь в очень разных сферах. Иногда ее используют как более дешевый заменитель песка, хотя для ответственных работ она не годится. Высокий процент глинистых частиц может вызывать набухание и морозное пучение грунта.
Супеси разделяют на легкие (3-5% глины) и тяжелые (5-10% глинистых частиц). Кроме того, они бывают крупнозернистыми, мелкозернистыми и пылеватыми (зависит от диаметра песчинок). Эта классификация влияет на области использования материала.
Основные свойства супеси:
- Низкая пластичность
- Хорошая водопроницаемость (по этому показателю супесь превосходит суглинок, но уступает песку)
- Низкая несущая способность (2-3 кг/м³)
- Незначительная склонность к набуханию и морозному пучению
- Невысокая цена
Материал применяется в следующих сферах:
- Строительство
- Дорожные работы
- Благоустройство территории
- Сельское хозяйство
Подробнее о них вы узнаете в следующей части текста.
Строительство
В строительстве супесь применяется для:
- Выравнивания и поднятия участков
- Обратной засыпки фундаментов
Дальше мы расскажем, как конкретно применяется супесь в строительстве.
Выравнивание и поднятие участков
Супесь – это достаточно хороший и доступный по цене планировочный грунт. С его помощью можно выровнять или поднять участок перед началом строительства. С таким материалом легко работать: он не липнет к инструментам, почти не пылит и меньше разносится по территории, чем обычный песок. К тому же, и стоит супесь дешевле.
После строительства супесью можно засыпать участки, на которых в дальнейшем будет разбит газон или огород. Сверху ее покрывают слоем чернозема или другой плодородной почвы. Также из супеси можно сделать нижний слой основания перед укладкой асфальта или тротуарной плитки. Сверху при этом нужно сделать слой из гравия или щебня.
Вместо супеси для выравнивания и поднятия участков также используют суглинок, глину, дресву, вскрышной и строительный грунт.
Обратная засыпка фундаментов
Супесь в холодное время года меньше пучинится, чем глина и суглинок. При обратной засыпке практически нет риска, что такой грунт вызовет деформацию основания дома, спровоцирует образование трещин.
С другой стороны, супесь не сможет обеспечить гидроизоляцию, хотя и будет быстро пропускать воду из верхних в нижние слои. При низком расположении грунтовых вод это может обеспечить сухость фундамента и подвальных помещений. Если водоносный горизонт высоко, у дома лучше устроить полноценную дренажную систему с гидроизоляционной обработкой фундамента.
Для засыпки пазух фундамента лучше подойдет песок. Материал по своим свойствам похож на супесь, но стоит дороже. Зато количество гидрофильных глинистых частиц, способных к набуханию, у него ниже, а водопроницаемость выше.
Дорожные работы
Применение супеси в дорожном строительстве немного ограничено. Не все виды материала используются в этой области.
Чаще всего грунт приобретают для следующих работ:
- Оборудование оснований грунтовых дорог
- Строительство насыпей
- Засыпка обочин
Дальше мы расскажем, какую супесь и при каких условиях применяют на дорогах.
Оборудование оснований грунтовых дорог
Из супеси также делают подушку под верхним слоем грунтовой дороги. Она создает устойчивое основание и равномерно распределяет нагрузку, передаваемую сверху. Но при этом обязательно нужно использовать также геотекстиль.
Вместо супеси для нижнего слоя основания чаще используют песок, в нем меньше примесей глины. Но этот материал всегда дороже, чем супесь. Заменить его можно также отсевом щебня или дресвой.
Оборудование насыпей
Насыпи из супеси делают под дрогами с низким трафиком. Для этих целей рекомендуют использовать крупнозернистую легкую супесь (примеси глины не превышают 5%). Мелкозернистый материал при увлажнении приобретает свойства плавунов и теряет свою устойчивость. Его не рекомендуют применять на дорогах, где уровень грунтовых вод выше 2м. Пылеватые супеси для насыпей не подходят.
Засыпка обочин
Для обочин супесь подходит условно. Из нее можно сделать нижний слой, а сверху засыпать гравий или щебень. Супесчаный грунт с примесями органики можно использовать на обочинах, которые будут засевать травой.
Благоустройство территории
Супесь широко используется в коммунальном хозяйстве, при обустройстве территории вокруг жилых домов и частных построек.
- Рекультивации
- Засыпки траншей и котлованов
- Засыпки оснований под газонами и клумбами
- Оборудования нижних слоев садовых дорожек
- Борьбы с гололедом
О каждой сфере применения вы можете прочитать дальше.
Рекультивация
На территориях, где раньше были карьеры, свалки или строительные площадки, нужно восстанавливать экологию. Со временем земли можно превращать в пашни, сенокосы, общественные парки или лесопосадки. Для этого карьеры засыпают, а на свалках частично или полностью заменяют грунт.
Супесь успешно применяется в рекультивации. Материал недорогой, служит основанием под плодородной землей. Заторфованный супесчаный грунт сам становится субстратом для растений. На такой почве хорошо растут хвойные деревья и кустарники.
Кроме супеси для рекультивации используются и другие материалы. Глубокие карьеры сначала засыпают вскрышей, дресвой. Верхние слои делают из суглинка, глины или растительного грунта. Подходит для этих целей торфогрунт, но он легко воспламеняется. Если земля в дальнейшем будет использоваться в сельском хозяйстве, их покрывают сверху черноземом.
Засыпка траншей и котлованов
Засыпать котлованы и траншеи супесью удобней, чем суглинком или глиной. Этот материл не липнет к лопатам или ковшам бульдезеров. Он хорошо пропускает воду, и участок в будущем не превращается в болото. Супесчаным грунтом можно заполнять траншеи с коммуникациями. Он не сильно пучинится и слабо набухает, кабелям и трубам не грозит деформация.
Супесь можно использовать и для засыпки дренажей. Она хорошо фильтрует жидкость и предотвращает загрязнение дренажных отверстий. Лучше всего выбирать легкую разновидность материала, содержание глины в которой не превышает 5%. В дренажных системах чаще используют песок, он лучше очищен. Но супесь стоит дешевле, в нашем регионе она доступнее.
Засыпка оснований под клумбами и газонами
Супесь хорошо пропускает дождевую и талую воду, и она не будет застаиваться на поверхности газона. При этом глинистые частицы способны задержать часть влаги вместе с питательными веществами, чтобы те не вымывались в глубокие грунтовые горизонты. Поверх супеси рекомендуют выстилать чернозем, торфогрунт или другой вид плодородной почвы.
Оборудование нижних слоев садовых дорожек
По рекомендациям нижний слой дорожки следует делать из песка. Он создает преграду для роста сорняков, предотвращает загрязнение щебня грунтом, хорошо пропускает воду. Но для экономии средств песок вполне можно заменить супесью.
Временные дорожки или проходы между грядками нередко просто засыпают супесчаным грунтом. Это простое и дешевое решение. Кроме того, материал можно использовать для разметки будущей дорожки.
Борьба с гололедом
Супесь – это один из самых дешевых вариантов для борьбы с гололедом. Она стоит меньше песка, а функцию свою выполняет не хуже. Единственный недостаток – высокое содержание глины. Она может загрязнять обувь, набиваться в шины автомобилей. Когда лед подтает, на его месте образуется болотистая жижа.
Сейчас выпускается много более современных средств для борьбы с гололедом. Но у них есть свои недостатки. Стоят вещества дорого и не всегда безопасны для экологии. Поэтому во многих городах по старинке применяют отсев, песок или супесь, иногда их смешивают с поваренной солью – чтобы эффективнее бороться с наледью.
Сельское хозяйство
В сельском хозяйстве супесчаный грунт можно использовать для таких целей:
- Улучшение структуры глинистых и суглинистых грунтов
- Создание почвосмесей
Подробнее об этом вы узнаете дальше.
Улучшение структуры глинистых и суглинистых грунтов
Глинистый и суглинистый грунты обладают низкой плодородностью. Их трудно обрабатывать. Они тяжелые, налипают на инструменты. Такой тип почвы плохо сказывается на растениях. В многочисленных закрытых порах накапливается и удерживается вода, что ведет к гниению корней. При высыхании грунт становится плотным и твердым, корневой системе не хватает воздуха.
Супесь обладает лучшей водопроницаемостью, в ней больше открытых пор. При добавлении ее к суглинку или глине, грунты становятся более рыхлыми, лучше пропускают воду и воздух.
Вместо супеси для улучшения структуры грунта можно использовать торф. Этот материал имеет высокую пористость, но содержит также много органики. Воду торф удерживает. В нем много неразложившихся остатков трав, мхов, впитывающих жидкость как губка.
Создание почвосмесей
Из супеси делают почвосмеси для рассады, выращивания комнатных цветов и тепличных растений. Его смешивают с растительным перегноем, торфом, дерновой или листовой землей, черноземом.
Для семян лучше всего брать смесь супеси и растительного перегноя, в соотношении 1:2. В грунт можно добавлять еще по 2 части садовой или дерновой земли, чернозема. Материал хорошо подходит для выращивания орхидей, к нему добавляют хвою, кору деревьев, верховой торф.
В теплицах супесь смешивают с торфом или торфогрунтом. Ее можно использовать как самостоятельный грунт при выращивании лука, зелени, если поливать растения питательными подкормками.
Для каких работ супесь не подходит?
Итак, мы рассказали о тех работах, где можно использовать супесь. Да, не везде она будет лучшим решением, но если стоит задача сэкономить, то применение супеси себя вполне оправдывает.
Однако на многих сайтах в интернете вы можете найти и другие способы использования этого грунта, не описанные нами в тексте выше. Теперь мы расскажем, почему не включили их в список сфер применения супеси.
Вот для чего супесь точно не стоит использовать:
- Укрепление суглинистых и глинистых грунтов
- Изготовление бетона
- Производство асфальтобетона
Укрепление суглинистых и глинистых грунтов
Добавление супеси уменьшает пучинистость таких грунтов. Но, как мы уже говорили в начале статьи, несущая способность супеси крайне мала. При возведении фундаментов она сама требует укрепления. Поэтому глину и суглинок следует укреплять скалой или крупным щебнем, но уж точно не супесью.
Изготовление бетона
Некоторые начинающие строители пробуют добавлять супесь в бетон. Этого делать тоже нельзя. По стандартам в мелком наполнителе не должно быть больше 3% глины. В супесчаном грунте этих примесей всегда больше.
Что происходит при замешивании раствора на супеси? Частицы глины набухают, увеличивая расход воды. Затем начинается неравномерное схватывание смеси. Впоследствии слабые глинистые включения в бетоне приводят к образованию трещин. Рисковать прочностью будущей конструкции ради экономии денег не стоит. Поэтому в качестве наполнителя для бетона рекомендуем вам использовать песок или отсев.
Производство асфальтобетона
Асфальтобетон производится на предприятиях в соответствии с ГОСТ 9128-2013 или ГОСТ 31015-2002. Эти документы устанавливают требования ко всем компонентам смеси – в том числе и к мелкому наполнителю. Так вот, если вы изучите данные ГОСТы, то не найдете в них даже намека на супесь. Асфальт готовится только на песке или отсеве.
Если где-то на просторах интернета вы найдете информацию о том, что супесь можно применять для этих трех целей, знайте: это неправда. Скорее всего, авторы таких рекомендаций просто не очень хорошо разбираются в теме.
И в заключение скажем, что супесь – это доступный и широко распространенный материал. Его покупают для строительства, коммунального и сельского хозяйства. Нельзя забывать, что это глинистый грунт и он не может полноценно заменить песок. В первую очередь это касается тяжелых супесей, в которых примеси частиц глины и пылевидной фракции составляют до 10%. Такой материал хуже пропускает воду и пучинится.
Список всех страниц по теме вы можете найти в разделе Применение грунтов.
Хотите знать больше?
О том, какие грунты бывают, в чем их особенности, какими свойствами они обладают, читайте на странице Грунты.
Рекомендуем также ознакомиться со следующими статьями раздела:
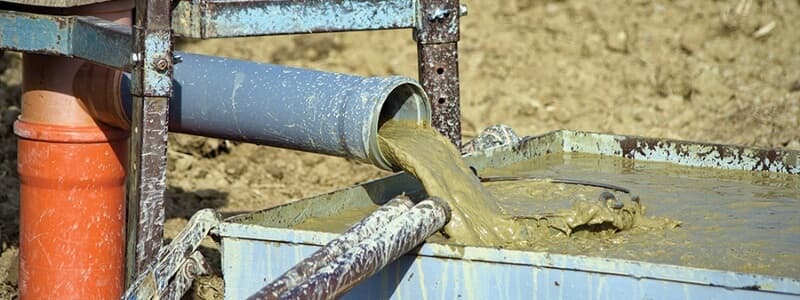
Очень часто люди переживают, что из скважины вместо чистой и прозрачной воды поступает вода с мутью, взвесями, с мелкими частицами песка, и, что хуже всего, глинистая вода. Вода с глиной — это самый неприятный момент, так его устранить значительно сложнее, чем песок. Чтобы понять, как бороться с этой проблемой, нужно понимать причины, которые могут вызвать это явление, другими словами, выяснить, почему из скважины идет вода с глиной.

Вода с глиной из только что пробуренной скважины
Бурильщики и инженеры знают несколько причин, по которым из новой скважины поступает глинистая вода:
Причина #1: Скважинная глинизация
Одной из часто встречающихся причин является скважинная глинизация, то есть элементарная ошибка при бурении. В процессе бурения по роторной технологии, с использованием прямой (иногда обратной) промывки буровым (глинистым) раствором, мастера, выполнявшие бурение, перед вскрытием водоносного горизонта не произвели замену этого раствора, как положено по технологии, на техническую воду. Как результат подобной халатности частицы глины под давлением проникли в водный слой, причём распространились на большое расстояние от скважинного ствола. Извлечь их представляется большой проблемой, и мутная глинистая вода может литься месяцами.
Не убрать глину из воды — чревато осложнениями — кольматажем пласта, то есть заполнением пор ствола скважины мелкими нерастворимыми в воде частицами глины, которые со временем слипаются и полностью их засоряют.
Единственным вариантом, способным сохранить скважину и её работу — постоянное упорное качание и раскачивание.
Причина #2: Расстояние скважины от водоема
Вторая возможная причина, по которой поступает вода с глиной — это близкое расположение скважины к естественным водоёмам, в котором вода отличается высоким содержанием глины, а грунты — рыхлостью, и невысокими вследствие этого фильтрующими свойствами.
Поэтому при бурении скважины необходимо отслеживать расстояние до близлежащих водоёмов (пруд, озеро, река).
Читайте также: Где правильно бурить скважину на дачном участке
Причина #3: Неправильная обсадка труб
Третья причина также относится к ненадлежащему выполнению бурения и обустройства скважины — неправильная обсадка труб, вследствие чего они не являются качественной изоляцией водного горизонта от верховодки — ливневых и талых вод, которые собираются на поверхности, и, стекая по наружным стенкам труб вместе с частицами глины, проникают в водоносный горизонт.
Данную проблему можно устранить при помощи дополнительного уплотнения затрубного пространства, используя трамбовку цементным раствором.
Читайте также: Какую обсадную трубу для скважины выбрать металл или ПВХ
Причина #4: Неправильная установка насоса
Еще одна причина поступления из скважины мутной глинистой воды встречается реже, и ей устранить проще, чем ранее перечисленные проблемы — это неправильный подвес насоса в скважинном пространстве. При расположении насоса ниже проектного, очень близко к фильтру, он начинает подавать вместе с водой взвеси, муть, илистые образования, частицы глины, втянутые им со дна скважины.
Поэтому для устранения этой причины достаточно перевесит насосное оборудование выше (как положено по проекту), с учётом динамического скважинного уровня, дебита скважины по паспорту, и основная масса глинистых донных отложений не будет попадать в насос.
Читайте также: Течет желтая вода из скважины. Что делать?
Если глинистая вода идет из старой скважины
Многие владельцы давно пробуренных и постоянно эксплуатируемых скважин сталкиваются с неожиданной проблемой. Из ранее нормально функционирующей скважины начинает поступать глинистая вода. Чтобы определить, что делать в каждом конкретном случае, как прочистить скважину от глины, необходимо выявить причину такого явления.
Основных, часто встречающихся причин — две и везде необходимы капитальные ремонтные работы.
Разгерметизация обсадной колонны, в результате чего из водоносного горизонта в скважинное пространство проникает глина.
Требуется поднять обсадную колонну, и определить участок разгерметизации, после чего — заделать его.
Повреждение фильтра (разрыв, трещины), и, как следствие, весь осадок, оседавший ранее на нём, стал поступать в воду.
Фильтр можно отремонтировать, или просто заменить его, на новое, исправное устройство.
Видео о способе чистки скважины с помощью 2-х вибрационных насосов
Статья обновлена: 19.02.2020
90000 Effects of Clay and Moisture Content on Direct Shear Tests for Clay-Sand Mixtures 90001 90002 The direct shear test using shear box is commonly recommended by practicing geotechnical engineers to obtain the cohesion and angle of internal friction for granular soils. The clay liners involve sand as a main constituent with added clay of variable proportions. This research aims at investigating the reliability of using the direct shear test for different clay contents and different moisture contents using an adequate shearing strain.These factors were found to affect the bilinear trends of shear force versus horizontal displacement profile as well as vertical displacement versus horizontal displacement curves. The cohesion of the mixture was found to increase consistently with the increase of clay content. Increase in moisture content was found to cause a drop in both cohesion and angle of internal friction. These changes are not independent of the density state of clay-sand mixtures. Standard compaction properties for a range of clay-sand mixtures were investigated.This work provides the general trends expected in direct shear tests for clay-sand mixtures of variable clay and moisture contents. 90003 90004 1. Introduction and Background 90005 90002 Artificial clay-sand mixtures were considered by design geotechnical and environmental engineers for use as hydraulic barriers. Adding clay to the sand helps in achieving low hydraulic conductivity. The term Bentonite Enhanced Sand (BES) was used by many researchers instead of clay sand mixtures, Studds et al.[1], Mollins et al. [2], and Stewart et al. [3]. As implied by the name the material is dominantly granular, and the amount of added clay is not large enough to classify the paste as anything other than sand. However there is a stage at which the paste starts behaving as pure clay when the sand grains are pushed apart, and clay dominates the engineering properties of the mix. The real boundary is not agreed upon as this is largely dependent on the activity and mineralogical composition of the clay.The ASTM standards classify the material as clay when the percentage of material passing sieve no. 200 is greater than 50%, and the consistency tests indicate CL classification. In the British Soil Classification System, detailed in BS 5930 Site Investigation, little above 35% fines (material passing sieve no. 200 63 microns) can lead to classify the material as clay. A bentonite sand mixture of high clay content may no longer be considered as a BES. 90003 90002 This research work considers adding Al-Qatif expansive clays to sand at proportions of 5% to 15% as a first stage.Other percentages and combinations of Al-Qatif clay and commercial bentonite material were also considered as possible alternatives. However the study of the direct shear tests was concentrated on the local clay and sand mixtures. Compressibility and swelling tests were carried out on the mixtures to help understanding the trends and behaviour of the direct shear tests. Falling head permeability tests were conducted for 5 and 10% clay-sand mixtures compacted to variable moisture contents at the maximum dry density.90003 90002 The direct shear test is based on forcing the sample to fail along a predefined plane while being subjected to normal load. This gives a direct measure of the shear force capacity at specific conditions and enables determination of the angle of internal friction and cohesion. The shear stress in the shear box test is defined as the shear resistance developed within the sliding plane along a known section area of the sample. 90003 90002 The general trends of direct shear tests on sand and clays are shown on Figures 1 and 2.90003 90014 90015 90014 90015 90004 2. Materials and Testing Methods 90005 90004 2.1. Al-Qatif Clay 90005 90002 The clay soil studied in this paper was brought from Al-Qatif town in the Eastern Province of Saudi Arabia. The sand material used is typical fine-grained sand used in construction in the country. Characterization tests were carried out for Al-Qatif clay and the sand material. Classification tests included gradation, liquid limit, and plastic limit tests. The clay material was found to have high liquid limit and plastic limit and classified within CH group in accordance with the Unified Soil Classification System.Physical and chemical properties of Al-Qatif clay are given in Tables 1 and 2, respectively. 90003 90024 90025 90026 90024 90025 90029 90030 90031 90032 90025 90034 Property 90031 90034 Range 90031 90032 90025 90029 90030 90031 90032 90025 90034 Material passing sieve no. 200 90031 90034> 90% 90031 90032 90025 90034 Liquid limit 90031 90034 130-150 90031 90032 90025 90034 Plastic limit 90031 90034 60-70 90031 90032 90025 90034 Plasticity index 90031 90034 70-80 90031 90032 90025 90034 Maximum dry density 90031 90034 1.150-1.200 gm / cm 90072 3 90073 90031 90032 90025 90034 Optimum moisture content 90031 90034 32-40%. 90031 90032 90025 90034 Swell per cent (ASTM D4546) 90031 90034 16-18% 90031 90032 90025 90034 Swelling pressure (ASTM D4546) 90031 90034 5.000-8.000 kg / cm 90072 2 90073 (90094 γ 90095 = 1.200 gm / cm 90072 3 90073 ) 90031 90032 90025 90029 90030 90031 90032 90105 90031 90032 90025 90026 After Dafalla et al. [4]. 90014 90031 90032 90105 90024 90025 90026 90024 90025 90119 90030 90031 90032 90025 90034 K 90072 + 90073 (%) 90031 90128 K 90129 2 90130 O (%) 90031 90128 Al (%) 90031 90128 Al 90129 2 90130 O 90129 3 90130 (% ) 90031 90128 Si (%) 90031 90128 SiO 90129 2 90130 (%) 90031 90128 Ca 90072 2+ 90073 (%) 90031 90128 CaO (%) 90031 90032 90025 90119 90030 90031 90032 90025 90034 1.8 90031 90128 2.2 90031 90128 3.3 90031 90128 6.3 90031 90128 8.1 90031 90128 17.3 90031 90128 0.7 90031 90128 0.9 90031 90032 90025 90119 90030 90031 90032 90105 90031 90032 90025 90026 After Dafalla et al. [4]. 90014 90031 90032 90105 90002 The fine grained sand and several sand clay mixtures were investigated for compaction properties. Standard compaction tests were carried out in accordance with ASTM D 698 to establish the compaction characteristics of sand-clay mixtures.90003 90192 2.1.1. Bentonite 90193 90002 The bentonite used in this study was HY OCMA obtained by a local supplier. The index properties of HY OCMA bentonite used in the present study are given in Table 3. 90003 90024 90025 90026 90024 90025 90029 90030 90031 90032 90025 90034 Property 90031 90128 Value 90031 90032 90025 90029 90030 90031 90032 90025 90034 Specific gravity, GS 90031 90128 2.76 90031 90032 90025 90034 Liquid limit, LL (%) 90031 90128 480 90031 90032 90025 90034 Plastic limit, PL (%) 90031 90128 49.6 90031 90032 90025 90034 Plasticity index, PI (%) 90031 90128 430 90031 90032 90025 90029 90030 90031 90032 90105 90031 90032 90025 90026 Index property tests were carried out in the laboratory in accordance with BS 1377 Part 2: 1990. 90014 90031 90032 90105 90192 2.1.2. Sand 90193 90002 The sand used in this study was local sand obtained from within Riyadh city which is typical to that used in construction throughout the Kingdom. This test is carried out to establish the percentage of different grain sizes present in a soil.Procedure adopted for this test is ASTM D 422 — Standard Test Method for Particle-Size Analysis of Soils. 90003 90002 The specific gravity of sand was 2.66, and the grain size distribution of sand is presented in Figure 3. Values corresponding to uniformity and curvature coefficients are and , Respectively. D 90129 10 90130, D 90129 50 90130, and D 90129 90 90130 were measured as 0.20 mm, 0.25 mm, and 0.35 mm respectively. 90003 90014 90015 90002 The direct shear test was performed in accordance with ASTM standard D 3080 [5] for 15 clay-sand mixture samples grouped in sets of three so as to allow for variations in moisture content and clay content.The applied rate of strain was fixed at 0.12 mm per minute for all samples including the clay. The sample size was kept constant at 10 cm by 10 cm. Normal stresses applied to each sample were 0.5, 1.0, and 1.5 gm / cm 90072 3 90073. All samples were prepared at the maximum dry density as obtained in a standard compaction tests. The moisture range considered for the clay sand mixtures is 15%, 17.5%, and 20% whereas for the sand alone 7,10, and 13% were selected. The pure Al-Qatif clay was tested for three moisture contents: 30%, 35%, and 40%, at a dry density of 1.200 gm / cm 90072 3 90073. The moisture content values given here are all related to the initial state of the sample as the drained test does not allow measurements of moisture during testing. 90003 90004 3. Test Results and Discussion 90005 90002 The test results of dry density moisture content relationships are shown in Figure 4. It can be observed that adding clay contributes in increasing the dry density of the mixture and rendered the optimum moisture content increase and shift towards the right of the curve.The sand used here is poorly graded type which involves more voids than well-graded type material. Adding small amounts of clay may not be sufficient to fill up all the voids. The more clay added will contribute in higher unit weight. For specific compaction energy the soil water and air phases get rearranged to give a maximum unit weight at optimum moisture content. 90003 90014 90015 90004 3.1. Trends of Direct Shear Tests 90005 90002 The general trends for varying moisture are found typical for all proportions except for the magnitude of change.Three plots for the two extreme moistures tested for 5% clay sand mixtures are presented in Figures 5, 6, and 7. 90003 90014 90015 90014 90015 90014 90015 90002 Shear stress versus horizontal displacement graph indicates a general bilinear plot for all normal stress values within the elastic zone. Plastic softening occurs close to the critical shear value, and the slope of shear stress versus horizontal displacement flattens and indicates a drop in the shear stress over a wide horizontal displacement compared to the elastic zone.90003 90002 We can observe a drop in shear strength as a result of increasing the moisture content for all normal stresses. Defining dilation rate as the change of vertical displacement to horizontal displacement [6] we can see that the slopes are approximately similar but intercept the horizontal axis at variable points. Shifts in dilation slope intersection are observed due to increasing the moisture to 20%. This shift is negative (less than 15% moisture intercept) for the normal stress of 0.5 kg / cm 90072 2 90073 and positive for normal stresses of 1.0 and 1.5 kg / cm 90072 2 90073. 90003 90002 The same comparison is applied to clay sand mixtures of variable clay content. 90003 90002 The general trends for varying clay content are found typical for all proportions except for magnitude of change. Plots for the two extreme clay contents tested; 5% and 15% clay sand mixtures are presented in Figures 8, 9, and 10. 90003 90014 90015.90000 Can Plants Grow in Sand? 90001 90002 While pure sand is not an ideal medium for growing plants, it can be used to successfully grow a number of different plant species. I remember going to my grandparents ‘homes during holidays and summers, where the soil was a very deep, loose sand. They both lived in the same county in Texas, and both had large gardens where they grew all of the vegetables that are common in gardens in rural Texas, including watermelons, tomatoes, potatoes, corn, pinto beans, and okra.These sandy gardens were very productive, but there are some practices good gardeners employ to successfully grow plants in these soils. 90003 90002 Several guidelines for growing plants in sandy soils are discussed below. A USDA-ARS chart is below to show the variable types of soils, depending on the amount of sand, silt, and clay. 90003 90006 What Types of Plants Grow in Sand? 90007 90002 If you are thinking of growing plants in sand, consider growing succulents like cacti, sedum, lamb’s ears, purple coneflower, coreopsis, lavender, or euphorbia species.There are also sand-loving trees and grasses to consider. 90003 90002 These type of plants can withstand drying cycles easily and prefer a soil environment that does not retain excessive moisture. For these plants, growing them in a clay-type soil would likely end in their death. 90003 90006 Sand as a Plant Growth Medium 90007 90002 Sand has disadvantages as a growth medium, but luckily in nature, it usually does not exist in the pure state. There is usually at least some percentage of silt particles, which increases its ability to hold water and retain nutrients.Sand that is used for building purposes is washed to remove the smaller silt particles. A natural sand that has some silt and a little organic matter is best for growing plants. This type of soil is called either sandy loam or loamy sand, depending on the percentage of silt and sand. 90003 90006 Why Is Sandy Soil Bad for Growing Plants? 90007 90002 The issues with sandy soil are that the increased sand content makes it difficult for the soil to retain nutrients and water. The quartz crystals that make up sand are very fine, and they do not hold onto nutrients and water like regular soil does.Due to this, you have to be very careful when watering and using fertilizer. 90003 90006 Why Is Sandy Soil Good for Growing Plants 90007 90002 If you are careful and you understand the drawbacks, using a sandier soil can actually be very good for growing plants in. Since sandy soil is lighter and it does not compact, it is much easier to work with, and you will not have to worry about overwatering your plants like you would with regular soil. 90003 90024 Sand Is an Ideal Medium for Hydroponics 90025 90002 Although many different types of media can be used to grow plants in hydroponics culture, sand is one of the cheapest materials.It is easy to recharge with nutrients, and it can be washed easily. Some use a mixture of pea gravel and sand as a growth medium. You have to be careful though with what type of sand you have. In some regions, it may be more common to have a calcareous (calcium-based) sand particle. In that case, the calcium ions in this sand can rob copper from nutrient solutions, which is an essential micronutrient. With silica-based sands, micronutrient absorption is not a problem. 90003 90002 Hydroponics often use drip irrigation as a watering method to keep the sand moist.These watering solutions contain both macro and micronutrients to provide a constant availability of all of the minerals necessary for plant growth. 90003 90006 How Sand Affects Plant Growth 90007 90002 The sand content of your soil can have a huge impact on how your plants do. The important thing to keep in mind is how sandy your soil is and what type of plant you want to grow in it. Just because the soil is on the sandy side, it does not mean you can not grow anything there. Many plants do well in sandy soil, and they may do poorly in a soil that contains lots of dirt.90003 90002 For a plant to be healthy it requires room for growth, ample nutrients, and water. So long as you have the right balance of those three things, you can have lots of success in growing plants in sandy soil. 90003 90006 When to Amend Sandy Soil 90007 90002 Amending sandy soil is necessary in some cases to support plant growth. If you have an acidic (low pH) sandy soil and you wish to grow a plant that prefers a more alkaline (high pH) environment, adding lime is necessary. On the other hand, if you have an alkaline sandy soil and you want to grow a plant that prefers a neutral or acidic pH, an amendment with sulfur would be necessary.Have your soil tested to determine its pH by a lab or do it yourself if you have the means. 90003 90002 If you wish to grow plants that need more soil moisture, adding organic matter will help in that regard. Peat is a good addition as well as compost. Sometimes the battle for getting a plant established is the biggest obstacle. Once the plant has established a significant root system, pampering the plant with amendments and frequent watering may not be necessary. But, it pays to do your homework first as to what needs each of the plants has before you plant.90003 .90000 «Sand» means something different to me than it does to you, probably 90001 90002 Emily Lakdawalla • January 24, 2013 90003 90002 I had one of those «A-ha» moments last week where I suddenly realized that I had run afoul of a common problem in science communication: when the words I’m using mean something different to me than they do to almost everyone I ‘m talking to.The confusing word of the week: «sand.» 90003 90002 How can the word «sand» possibly be confusing? Well, the situation is a lot like the one with the word «rock,» which I talked about in this blog entry. Just as with «rock,» for geologists, «sand» has a definition that is far more precise than the way that the word is commonly used in conversation. 90003 90002 Geologist Chester K. Wentworth defined «sand» in a publication in 1922 along with «gravel,» «silt,» and «mud.» Sand-sized particles range in size from 63 microns to 2 millimeters.Gravel is anything larger than that; silt and mud are finer. When we think about sand, we usually picture quartz sand, because that’s what most sand is made of on Earth. But the term «sand» does not specify composition, it only specifies grain size. So you can have gypsum sand like at White Sands National Monument, or olivine sand on certain Hawaiian beaches, or any other composition where mechanical and chemical weathering bust rock of any composition into sand-sized particles. 90003 90010 90002 90012 Chester K.Wentworth 90013 90003 90015 Wentworth (1922) grain size classification 90016 The canonical definition of sediment grain sizes as defined by geologist Chester K. Wentworth in a 1922 article in 90012 The Journal of Geology 90013: «A Scale of Grade and Class Terms for Clastic Sediments». 90002 Sand on Mars is much more likely to be made of olivine than it is on Earth, because olivine is much more abundant at Mars ‘surface and Earth’s wet envrioment chemically alters olivine into other minerals.90003 90002 Now, while beach sand can be pretty homogeneous in size, most rocks and soils contain more than one size of sediment grain. To describe the grain size in a rock or sediment, then, you need to use a mix of these terms. According to the United States Geologic Survey, two systems defining how you describe the grain size of a rock or sediment are now in common use. One of them was defined by Francis Parker Shepard, the other by Robert L. Folk. 90003 90023 90015 Folk and Shepard sediment classification schemes 90016 90002 Both the Shepard and Folk classification systems involve a graphical tool beloved by geologists: a ternary diagram.In a ternary diagram, three endmembers are represented at the corners of a triangle, and you represent the proportion of those three endmembers in something by plotting a point somewhere inside the triangle. A pure sand would plot at the «sand» corner, but if there’s some clay in your sand but not very much silt, it would plot in the «clayey sand» region. If you’re not quite sure you get how a ternary diagram works, here’s an amusing exploration of the phase equilibria of pie crust that employs a ternary diagram.(Aside: I looked really hard yesterday to find funny ternary diagrams, and that’s the best one I could find, thanks to a tip from Patrick «Poikiloblastic» Donohue. I am sure there are more very silly or funny ternary diagrams among some geo prof’s slides somewhere. I’d love to see more examples.) 90003 90002 Anyway, back to Mars. Here’s a recent image from MAHLI that clearly contains quite a few fairly coarse grains. Most of them are under 2 millimeters in diameter, but a very few are more than 2 millimeters across, which puts them above «sand» and in «gravel» territory.So what we’re looking at here is a «slightly gravelly» something according to Folk’s classification scheme, but it’s hard to tell on this weathered and dusty surface whether it’s a slightly gravelly sandstone, or a slightly gravelly silty sandstone, or a slightly gravelly sandy siltstone, or whatever. 90003 90030 90002 90012 NASA / JPL / MSSS 90013 90003 90015 MAHLI view of «Gillespie Lake,» a coarse sandstone on the edge of Yellowknife Bay, sol 132 90016 Curiosity held its MAHLI camera within 3 centimeters of a ledge on sol 132 to examine its grains up close.The investigation revealed the rock to be a coarse sandstone, made up of cemented grains of a range of sizes. The biggest grains at lower left are about 2 millimeters long, which is larger than sand; technically, they are classified as «granules.» The whole view is about 4.3 centimeters wide; at full resolution, it is about 26.1 microns per pixel. 90002 Fine, you might be saying, but what’s the point of all this hair-splitting? It’s a good question. The answer is that grain size is an extremely important clue to the history of a rock.It tells you about how the rock’s sediment formed in the first place, and it influences what can have happened to the rock since it formed. 90003 90002 Here’s an expanded version of the Wentworth (1922) classification scheme that makes some of this a bit more clear. I particularly want to draw your attention to the last two columns, titled «Threshold velocity for traction.» It tells you how fast a stream has to be moving to shift grains of that size. I am not enough of a sedimentologist to know the difference between the two estimates, but the point is that grain size serves as a proxy for the speed of the flowing fluid that transported the sediment in the first place.Flow rate enters into estimates of flow volume. And now you’re measuring the size of little sand grains and using them to paint a picture of what kinds of things water was doing on Mars back when this rock first formed. (Some of you may be asking whether these numbers hold true for Mars, where the gravity is lower. I would think that it’d be easier to get sediment moving on Mars, but that’s just a guess. I did not take a sedimentology class in college. I am sure that settling velocity would be lower on Mars than on Earth.) 90003 90041 90015 Wentworth (1922) grain size classification detailed chart 90016 The canonical definition of sediment grain sizes as defined by geologist Chester K. Wentworth in a 1922 article in 90012 The Journal of Geology 90013: «A Scale of Grade and Class Terms for Clastic Sediments». 90002 The degree to which the grain size of a rock is uniform is also a really important clue to its sedimentary history. As a rule of thumb, a poorly sorted sediment (one in which the grain sizes vary wildly) has not been moved very far from its source; it’s some kind of mass movement, a sudden episode like a landslide or a flood in which a bunch of sediment was grabbed all at once from a source, carried quickly to a new place, and then dropped.90003 90002 But there are lots of natural processes that can sort out sediment by size, and most of these are controlled by the local speed of water flow. Imagine a mountain stream; it moves fast (and is helped along in moving large cobbles by gravity), so you see a stream bottom made of large rocks and very little sediment. Downstream, where the slope is less and flow slower, the stream bottom can be sandy, or even silty. When large rivers overflow their banks and debouch onto broad, flat floodplains, the water suddenly slows down.It can not carry boulders or even, usually, much sand far from the channel; instead, everything that was flooded is covered with mud, which, if you read the Wentworth diagram, has a grain size under 3.9 micrometers. The same thing happens when a mountain stream exits a valley onto an alluvial plain. All the big stuff gets dumped right next to the mountain, but the finer sediment gets carried farther. That makes a classic progression in alluvial fan deposits, where it’s coarser-grained near the valley wall and progressively finer grained as you travel down the widening fan.90003 90002 One last note about grain size and Curiosity. The MAHLI camera — that’s the hand-lens imager on the end of the arm — can achieve a maximum pixel resolution of 14 micrometers per pixel. when it’s held at its closest possible distance of 2.1 centimeters away from a rock. But it can not really see a grain in a rock if it’s only one pixel across; you need three or four pixels to tell one grain from another. Look at the Wentworth scale, and you’ll note that if MAHLI can see grains in the rock at its very closest distance, the grains must be at least 50 or 60 microns across.The boundary between silt and sand is at 63 microns. So where MAHLI sees grains, you’re probably looking at a sandstone; if MAHLI can not see individual grains, the grains are essentially silt-sized or smaller. 90003 90002 So next time you hear any geologist talking about «sand» or «silt,» now you know what we mean! 90003 90054 90015 Let’s Change the World 90016 90002 Become a member of The Planetary Society and together we will create the future of space exploration.90003 90002 Join Today 90003 90061 90015 The Planetary Fund 90016 90002 Help advance robotic and human space exploration, defend our planet, and search for life. 90003 90002 Donate 90003 .90000 Build a Clay (Cob) Oven in Your Yard! 90001 90002 How to build a wood-fired pizza / bread oven using local natural materials 90003 If you are looking for a small project to get your hands (and feet!) Dirty testing out some natural building skills, then building a wood-fired oven is a great place to start. If you have a little help, it takes just a couple days to build, then a few weeks to let it dry out (during which time, you can sculpt your oven to any shape), and then you’re ready for a pizza party !! 90004 What is a cob wood-fired pizza oven ?? Well…it’s a baking oven that is heated by lighting a fire inside, the fire warms up a thick clay oven wall, and the clay wall remains warm for hours after the fire is pulled out. So you build the fire in the same oven area that becomes your baking space. The beauty of this type of oven is a) the oven is simple to build using local, natural materials and b) the oven temperature remains very even throughout, with no hot or cold spots. Plus, it’s a fun project to do with a bunch of people and you can celebrate your accomplishment with a pizza party! 90005 90002 So, what do you need to know to ensure that your oven project is successful? 90003 90008 90009 90010 90011 FIRST 90012 90013, get this book: 90014 90015 90016 90017 90018 90019 90020 90017 90018 this book contains all of the information you 90008 need to successfully build a cob oven.Really! 90019 90020 90026 90027 90008 90009 90010 90011 SECOND 90012 90013, decide what size oven you want to build. 90014 The appropriate size for you will depend on how you intend to use your oven. Here are the variables effected by size: 90035 90036 The larger the oven, the more materials you need to build it. For example, an oven that is 36 «wide inside takes about twice as much clay, sand, & straw as an oven that is 24» wide inside. And more materials translates to more building time as well.90037 90036 The larger the oven, the longer it takes to heat up. For example, a 24 «wide oven takes about 2 hours of fire to heat up, whereas a 36» oven takes about 3 hours. 90037 90036 The larger the oven, the more mass, soooooo, the longer the oven stays warm. This means you can cook in it longer each time you fire it up. Especially if you a good insulation layer on your oven. 90037 90036 And obviously, the larger your oven, the more pizzas you can bake at once! (Or whatever you are cooking…) 90037 90044 So, think about how long you want to wait for your oven to heat up, how long you want the oven to stay hot (larger oven for pizza party use, smaller oven for personal use), and think about how big of a project you want to take on (do you want to build a small oven over 2 days or go for a larger oven and spend longer to build) ?? 90004 Typical sizes are 22-1 / 2 «, 27», or 36 «(these sizes work out well with the size of standard fire brick). Of course, there are mini ovens as well as massive ovens, but those are mostly for special use applications.90005 90004 90009 90010 90011 THIRD 90012 90013, decide if you will build a roof over your oven. 90014 90005 90004 A roof will help protect your oven from the elements, and allows you to bake even when the weather is sucky. Rain, especially, will erode a clay oven over time. You can either allow that, replaster your oven every year, put a tarp over your oven when it’s not in use, or …. build a roof to protect it. If you decide to build a roof, those materials will be in addition to those listed below.Build your roof so you have plenty of room to stand underneath, and to clear any smoke out. I recommend at least 7 feet of clearance under the roof. 90005 90004 90009 90010 90011 FOURTH 90012 90013, gather your materials. 90014 90005 90004 90011 You will need the following materials to build your oven: 90012 90005 90008 90035 90036 90011 90010 Clay 90013: 90012 Clay is your essential ingredient, because it is the binder that holds all the materials together. When wet, clay is sticky.When it dries, it is strong & hard. You can use clay-soil OR you can purchase dry, bagged, pottery clay. 90076 (see video below on how to test your soil for clay content.) 90077 If you are using clay soil, you will need to determine the proportion of clay in your soil (it may feel like it’s 100% clay, but it rarely actually is … usually there is sand in there as well). 90008 90011 HOW MUCH? 90012 The amount of clay needed depends on the size oven you are building. Here I am talking about total clay, so if you are using soil with clay in it, you will calculate the amount of clay based on the percentage of clay in the soil (So, if your soil is 50% clay & 50% sand, then every bucket of soil = 1/2 bucket of clay & 1/2 bucket of sand.) So total clay needed is about 25 gallons for a 22-1 / 2 «oven, about 35 gallons for a 27» oven, and about 50 gallons for a 36 «oven. 90037 90036 90011 90010 Sand 90013: 90012 Sand is your aggregate. It reduces shrinkage of the clay as it dries and it adds total strength to your oven walls. You need to use angular sand, not smooth sand or silt. Concrete sand is pretty cheap & works great. I also use sand to build the form for the oven (this sand is taken out at the end and can be used to make plaster if you finish your oven that way).90008 90011 HOW MUCH? 90012 Plan on about 300 to 500 lbs of sand if you are using clay soil with at least 50% sand content; if you are using bagged pottery clay, double the sand. 90037 90036 90011 90010 Straw 90013: 90012 Straw is used to create an insulating layer for your oven. It is also helpful to stand on the bales as your oven gets tall. Make sure your straw is clean, dry, and mold-free. 90008 90011 HOW MUCH? 90012 You need about 2 to 3 strawbales for a small oven and 3 to 4 strawbales for a larger oven.If you plan to sculpt your oven into a fun shape, make sure you have ample straw. 90037 90036 90011 90010 Firebrick 90013: 90012 This is what I like to use for the floor of the oven, because they do not split in the heat of the fire and they have extremely squared edges, so they make a really smooth floor. Typical firebrick are 4-1 / 2 «x 9» x 1-1 / 2 «. You can lay out the bricks for your desired oven size to see exactly how many you need, but below is what I use as a reference. 90008 90011 HOW MUCH? 90012 I use 15 firebrick for a 22-1 / 2 «oven (12 for the floor + 3 for the door opening), 22 firebrick for a 27» oven (18 for the floor + 4 for the door opening) , and 37 firebrick for a 36 «oven (32 for the floor + 5 for the door opening).90037 90036 90011 90010 Water 90013: 90012 you will need a running water source to wet the clay binder. (And is helpful for clean-up) 90037 90036 90011 90010 Newspaper 90013 90076 (optional) 90077: 90012 I use this as a layer between my sand form & the first layer of clay … it lets you know when to stop digging out your sand so you do not accidentally gouge your oven wall. 90037 90036 90010 Stones or brick or urbanite 90013 90076 (optional) 90077 90011: 90012 I recommend building your oven up on a base so you do not have to kneel on the ground to tend your fire & bake.A comfortable height is typically 24 «to 36» off the ground, but choose whatever height is comfortable to you. You can use any kind of masonry material that is available to you, and you can make cob (clay, sand, and straw) to make a strong mortar. Just make sure that your oven base is very stable. Once the base is built & dry, do not forget to fill in the center (with something sturdy & non-compressible), so you have something solid to build your oven floor on. 90037 90044 90076 Note: I highly recommend collecting extra material than you think you need so you do not run out of anything mid-stream.90077 90008 90076 90008 90077 90002 How to test your soil to see if it has clay in it: 90003 90002 90141 90142 90003 90008 90011 And this is my tools list when doing an oven workshop: 90012 90035 90036 buckets — I like to have ample 5-gallon buckets; you these to transport and measure your materials; to me, 5 buckets is a minimum, but if you are working alone, one bucket will work 90037 90036 tarps — I like to have 2 tarps, but one works; 10 ‘x 10’ seems to be a manageable size 90037 90036 shovels — if you are working alone, one shovel is fine; if you are going to have a bunch of people, have at least one shovel for sand & one for clay (more if you will have lots of helpers) 90037 90036 sifter — if you are using clay soil dug out of the ground, I find it easiest to sift it roughly through a 1/2 «screen to remove any rocks & to break up the clay and make it easier to mix; I like a table screen that fits over a wheelbarrow 90037 90036 a wheelbarrow is useful to transport material, but is not essential 90037 90044 90008 90009 90010 90011 FINALLY 90012 90013, build your oven! 90014 90166 STEP ONE: Build your base 90167 90015 90016 90017 90018 90019 90020 90017 90018 I like to make a shallow foundation filled with gravel to help keep the oven from moving with freeze-thaw cycles in the ground.90019 90020 90026 90027 90008 90015 90016 90017 90018 90019 90020 90017 90018 You can build your base with any masonry material — this example uses old cobblestones from the streets of Philadelphia, built with a cob (clay, sand & straw) mortar mixture. 90019 90020 90026 90027 90166 STEP TWO: Fill in your base & build the oven floor 90167 90015 90016 90017 90018 90019 90020 90017 90018 Fill in the base of the oven with a non-compressible material, like tamped gravel.Then add a 4 «or so layer of sand that extend just above the sides of your base. Tamp and level that sand. 90019 90020 90026 90027 90008 90015 90016 90017 90018 90019 90020 90017 90018 Then build your oven floor with the firebricks, making sure they are nice & tight to each other. Tamp your bricks and make sure they are nice & level. Spend some extra time here … the nicer your oven floor, the fewer nooks & crannies that will cause you potential headaches when you are baking.90019 90020 90026 90027 90166 STEP THREE: Build the form for your oven cavity 90167 90015 90016 90017 90018 90019 90020 90017 90018 Basically, you are building the most boring sand castle ever: a nice dome. The dome width is the diameter of baking space you want. The height of the dome will be 75% of whatever your width is. 90019 90020 90026 90027 90015 90016 90017 90018 90019 90020 90017 90018 Add a layer of newspaper over your sand so that when you dig out the sand at the end, you know when to stop digging (before gauging your clay layer).90019 90020 90026 90027 90166 STEP FOUR: Build the clay mass layer of your oven 90167 90015 90016 90017 90018 90019 90020 90017 90018 The first layer of your oven is cob without the straw, so just sand & clay. You want enough clay so the mixture is sticky, but enough sand so that this layer does not shrink (and then crack) a lot. For most types of clay, that means between 20% and 25% total clay content. I like to make this layer 4 «thick, all the way around your sand dome.I do not worry about the door at this point … I carve that out later. 90019 90020 90026 90027 90166 STEP FIVE: Add the insulation layer 90167 90015 90016 90017 90018 90019 90020 90017 90018 Your insulation layer is mostly straw, with just enough clay to act like hairspray to hold the straw together. The idea is to keep the heat inside the oven for as long as possible, increasing the efficiency. What to do: use a clay mixture that is 50% clay & 50% sand (if that is the proportion in your soil, then you can just use your soil), wet the clay / sand mixture so it is quite soggy…like a chocolate milk shake, then add lots of loose straw, until all of the straw is coated with clay. Then smoosh it in place. I use about 6 «thick of insulation. 90019 90020 90026 90027 90166 STEP SIX: Cut the door 90167 90015 90016 90017 90018 90019 90020 90017 90018 I like to sculpt the door in the insulating layer. The straw has really good binding properties, which make it easy to sculpt a nice arch for your door. If you are not doing a chimney, then the height of the door needs to be 2/3 as high as the inside dome.This allows fresh oxygen-rich air to come in the bottom of your door opening to feed your fire and the exhaust exits the top of the door area without smothering the fire. If you make a door ahead of time, you can use that as your template for sculpting & cutting your opening. 90019 90020 90026 90027 90166 STEP SEVEN: Let the oven dry for a few days, then pull out the sand 90167 90015 90016 90017 90018 90019 90020 90017 90018 There are a few strategies for taking out the sand.I like to carve out the door the day the oven is finished, then pull out about 1/3 of the sand, and then let the oven sit for several days to let the clay mass layer dry out a bit. Then you can pull out the remainder of the sand without risking any collapse of the dome. But do not worry, if you pull out the sand too soon and part of it collapses, you can just patch it with the same materials. 90019 90020 90026 90027 90166 STEP EIGHT: Sculpt your oven as desired 90167 90015 90016 90017 90018 90019 90020 90017 90018 Use clay, sand, and lots of straw to make a firm, cob mixture that you can use to sculpt your oven into any shape that makes you happy.If your oven has begun to dry out when you start sculpting, be sure to wet down the surface before you add your sculpted pieces, otherwise they will not bond to what is existing. You can also put mosaic tile on your oven, or plaster it with clay or lime plaster. (This photo shows a lime plaster that is fairly weather-resistant.) 90019 90020 90026 90027 90166 STEP NINE: Let your oven dry out completely & then have a pizza party! 90167 90015 90016 90017 90018 90019 90020 90017 90018 Fire the oven for 2 to 3 hours, with a nice hot fire.Then let the fire go to embers. If you made a fairly large oven, you can distribute the coals around the back perimeter of the oven to keep it hotter longer. Otherwise, pull all of the fire out (into something non-flammable, non-meltable) and clean the oven floor with a damp cotton mop or cotton T-shirt. 90019 90020 90026 90027 90015 90016 90017 90018 90019 90020 90017 90018 Put the door on for about 20 minutes to let the temperatures come to equilibrium, and then bake pizza, bread, casseroles, cookies, pies, and anything else your heart desires.As the oven gets to around 100 degrees, you can even use it to culture yogurt. And keep a well-fitting door on the oven to keep the heat in. 90019 90020 90026 90027 90008 90009 Still not clear? Watch these videos that show you the step-by-step process for building a cob oven. 90014 Building the floor of the oven & the sand mold for the oven cavity 90008 90346 90142 90004 Building the thermal mass layer (that will heat up when you build your fire) & the insulating layer that keeps the oven hot longer.90008 90350 90142 90005 90004 Digging out the sand form & baking your first pizza. 90008 90355 90142 90005 90004 Happy baking !! 90005 .